Thursday, September 27, 2012

Guest Room 95% Complete!

Hi everyone! I hope you all are doing well this Thursday morning! I just got finished putting something up on Craig's List and taking some photos of the Small Guest Room. We got the Carpet in!! Yay! The only thing I am waiting on is for the pillows for the bed to arrive via the mail and then maybe a few other accessories and it will be COMPLETE! I know, it feels like it has taken forever to get this done, but I am not ready to move onto another room for the time being! But I am going to give you some shots of the Guest Room!

BEFORE

This is what the room looked like before we did anything to it! I wanted to give you a sneak peek of the before shot so you will  know just how much work it entailed! Blue walls, leftover border paper/glue that was a nightmare!! Old ugly dusty dealing fan, and the most hideous stained blue carpet you have ever seen! I am not going to reveal the entire room just yet, I want it to be perfect before I do but here are some teaser photos for you to look at until then!!

Auction lantern, antique market dish, grandmother's shell necklaces!

Auction Dresser Repaint!

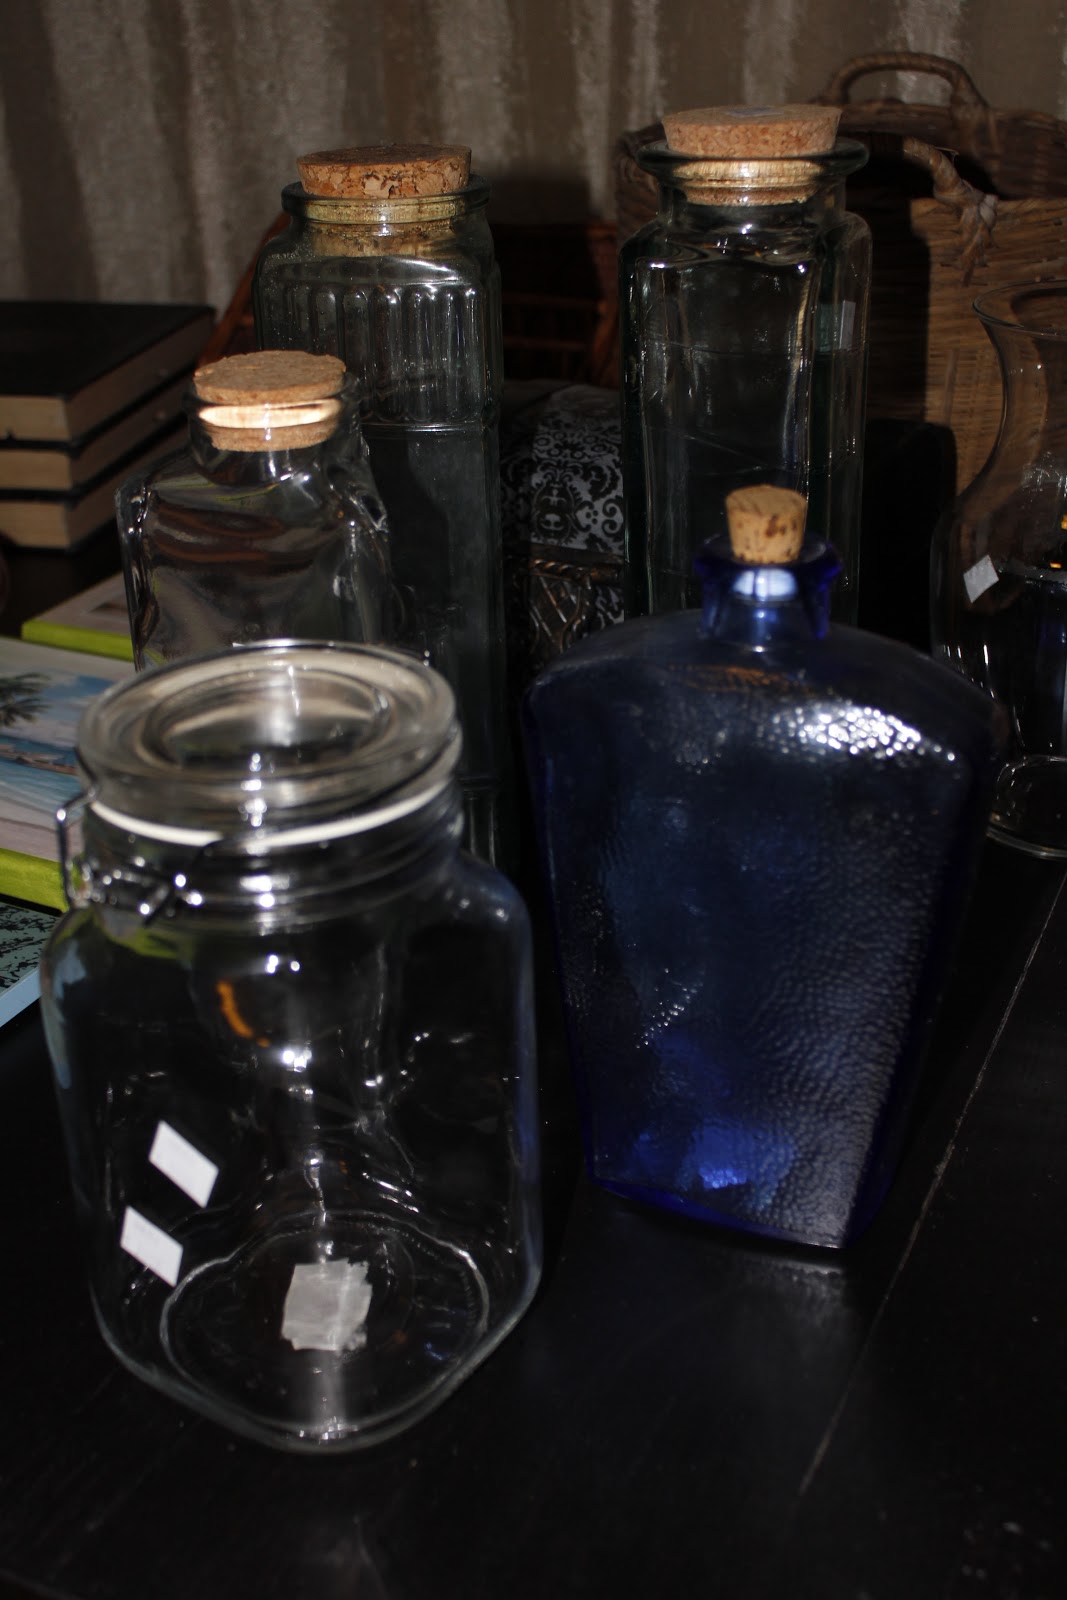
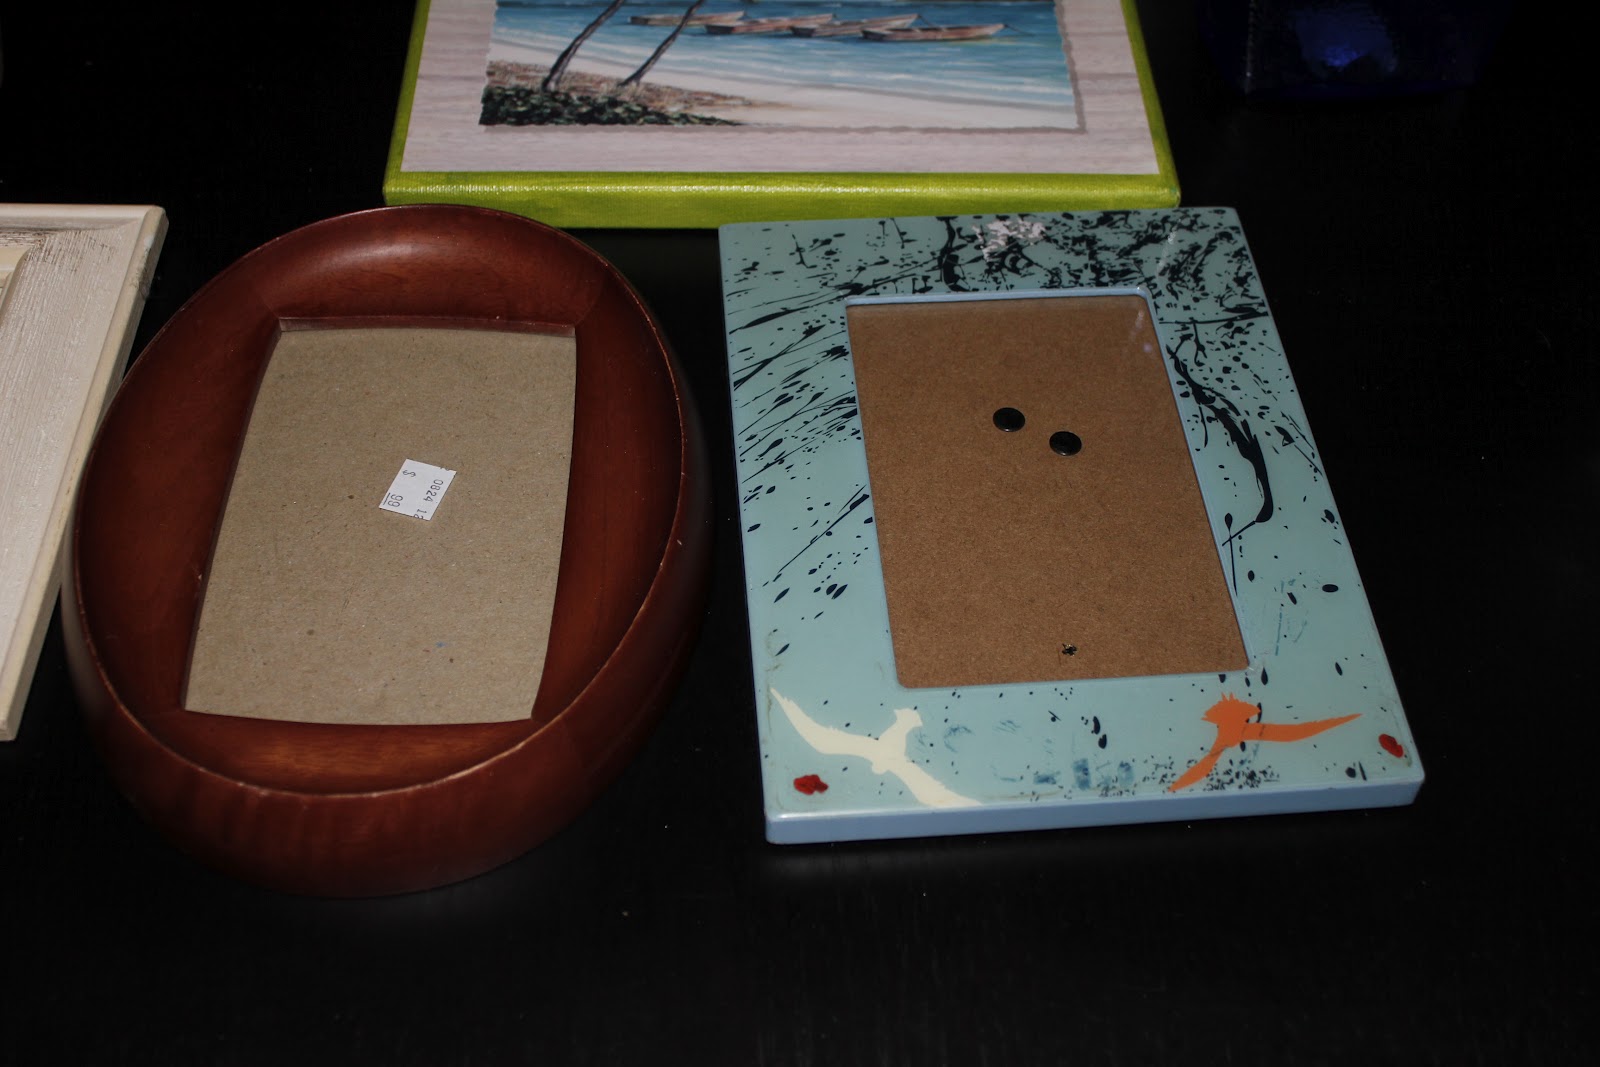
Goodwill Bookshelf and Frames, Antique Store Finds

DIY Inspiration Board

The pillows should be in the mail soon, I ordered them on the 25th! I already have the sheet set for the bed, so it just needs to be washed and ironed before I put it on there, The desk needs to be accessorized and a few more things need to be hung on the wall, but it is definitely almost there and now I can start on our master bedroom! 

We already picked out the wall color, we are selling our bed/mattress and getting a new mattress set, we are moving up to king from queen! YAY!! I am going to be making a DIY headboard, and a few other things for the master bedroom but you will have to stay tuned for all of that when it happens!! I guess I should take some before shots of that room, well here I go!!

Have A Magical Day!!

Tuesday, September 25, 2012

DIY Repaint of $10 Auction Dresser

Lovely Tuesday morning to you all!! Sorry I have been MIA for a few days we have been pretty busy lately. Saturday afternoon we went to an auction down the street and bought a TON of stuff, I believe it was 25 items total, but we got some amazing deals and I am happy to report that I have already started making them over! In the guest bedroom, I needed a small set of drawers for guests to put their clothing in when they stay over. I didn't need nor want anything large so I was hoping that they would have something small at the auction. Well, they did, and I managed to get it for only $10. All it needed was a good cleaning and coat of paint or two...or 5...LOL So I dove in and got it! Here is what it looked like before...


A little ugly right?? Yeah, so I already had two colors of paint that I thought I could possibly use on it. The one called Beryl from my toy box makeover, and the Sea Glass color from the bookshelf repaint. I looked on the internet to see if I could get some inspiration for a paint job and I saw a really cool gradient paint job on a chest of drawers and I thought it looked pretty cool, so I decided to do that. Yesterday after we picked up a brand new mattress for the bed ($55 from craig's list still wrapped in plastic!) I headed over to Home Depot to pick out 3 other paint colors. I ended up choosing a color called Gull (Off-White) for the dresser itself, and the two other colors for the bottom two drawer fronts Hummingbird Blue and Araucana Teal, all from the Martha Stewart Paint Line by Glidden I believe. So anyway, when I got home I got right to painting and cleaning and before I knew it, I was finished and had a lovely new dresser for the middle bedroom! So what do you think??


I couldn't be happier with it, considering it didn't cost me that much to fix it up..or buy it for that matter! Now I guess I just need to accessorize it and maybe add some liner paper or drawer sachets? Moving on, we also managed to sell our IKEA sideboard yesterday from our dining room. It was really not practical to have it, besides I purchased another piece of furniture that could go in it's place for the time being...all it was doing was holding our board games, and they all didn't even fit in it. I was going to work on the den as my next project but I think I have shifted gears a little bit and am now maybe going to start on the bedroom? I have a really good idea of what I want to do in there, and the only problem is going to be paying for a brand new mattress! EEEK!! 

Have A Magical Day!!

Saturday, September 22, 2012

Organized Closet, Guest Room 90% Complete!

Good morning, good morning you guys!! It is a lovely Saturday morning, well for 30 more minutes anyway, then it will be afternoon. Today we are going to an auction just down the street from my house! I have seen some of the pictures of things up for auction online and saw a few things that I think will go well in the den and breakfast room in the new house! I guess we will see if I actually come home with anything or not later on. 

Without having to buy anything I was able to organize the craft closet which I was very happy about. I don't really want to buy anything because I am not sure how the closets are going to be in the new house and I didn't want to buy things for this house only to find out that they wouldn't fit in the closet at the new house! Sorry, I think I am rambling a little bit, but you get the picture! So I was going to show you some before and after photos of the closet! Before it was blue and full of junk, so I took the junk out, moved it where it needed to go and assembled all of the craft supplies from all of the rooms around the house! It is so nice having a place for something, now I know when I need a pair of scissors exactly where they are supposed to be, the only problem might be putting them back when we are done...

Before

After: Nice and Organized!

With the sheets and pillowcases coming in the mail today there are only 2 other things that need to be done for this room to be completed!!! We have to buy the mattress for the bed, and change the carpet! I am so proud of what has been accomplished in here and I can't wait to move onto the next room the den! Soon I will take some photos so you can see the completed room! It took a little bit of hard work (not much) to change this room from the junk room it was before to a usable space with a guest bed, bookshelf, desk with computer, craft closet and ROOM to walk ;) 

I'm sure I will add some more little touches on the way, I always find things that speak to me, like I think it would be nice to add a little welcome tray to the bed, with maybe a little dish for chocolates or something sweet for a guest! This room gets me excited for the time when we get to go house shopping! I have already been sneaking peeks at all of the houses on the market in our new town and I absolutely cannot wait to go and see some of them...darn waiting..it is killing me!!

Have A Magical Day!!

Thursday, September 20, 2012

Chicken-and-White Bean Chili with Pumpkin!

Another good morning to you all out there, I have another busy day ahead of me, the closet is finally finished being painted and now I can start organizing all of the craft items! I think this is going to be the hardest part of all of this, so hopefully it won't be too hard of a task. I have been trying to get ideas for a craft closet on Pinterest. I have seen a few things that I like but mostly they won't really help me since this closet isn't permanent, since we are moving in the near future. I am sure it will all work out though. 

So, it is that time of year when pumpkins are showing up in all of the stores and the weather is getting a little cooler. It is my absolute favorite time of year.  The weather is always perfect, blue skies, beautiful trees, breeze, just everything about Fall is wonderful! With that in mind, last night I made a really great dish. I was so impressed with how good the recipe was that I thought I would share it with you all here! It may inspire you to make your own during this wonderful season! 

Chicken-and-White Bean Chili with Pumpkin
Coastal Living Magazine October Issue

Packed with flavor, this recipe can easily be adapted for vegetarians. Simply exchange vegetable broth for chicken and omit the cubed chicken and stir in more beans!

Prep: 25 minutes  Cook: 32 minutes

2 Tbsp chili powder
1 Tbsp ground cumin
3/4 tsp salt
1/4 tsp black pepper
1/8 tsp cayenne pepper
1 Lb boneless, skinless chicken breasts, cubed
1 Tbsp Olive Oil
1 onion, chopped
1 red bell pepper, chopped
1 jalapeño, seeded and minced
2 garlic cloves, minced
3 cups peeled and cubed pumpkin, calabaza, or butternut squash
2 (14 oz) cans chicken broth
1 (15.5 oz) can cannellini beans, rinsed and drained
1 (14.5 oz) can diced tomatoes, undrained
2 Tbsp tomato paste
1/2 tsp dried oregano
2 Tbsp fresh lime juice
Garnishes: sour cream, sliced jalapeños, chopped fresh cilantro

1. Stir together first 5 ingredients in a small bowl. Combine chicken and 1 Tbsp spice mixture in a medium bowl, and toss to coat. Set aside remaining spice mixture.

2. Heat olive oil in a large soup pot over medium heat; add chicken and cook, stirring often, 5 minutes or until no longer pink. Transfer to a plate.

3. Add onion, bell pepper, and jalapeño to soup pot; cook over medium heat, stirring often, 5 minutes or until vegetables are softened. Stir in garlic and reserved spice mixture; cook, stirring constantly, 1 minute.

4. Add pumpkin and next 5 ingredients to soup pot. Bring soup to a boil, reduce heat, and simmer, covered, 25 minutes or until pumpkin is tender. Return chicken to pot; simmer 2 minutes or until heated through. Remove from heat, and stir in lime juice. Garnish, if desired. Will keep, covered in refrigerator, up to 3 days. Makes 9 cups.

I hope you take the time to try out this recipe, it was fabulous and I will definitely make it again! For now Mr. C has the leftovers to take to work for lunch, and I will get back to craft organization!

Have A Magical Day!

Tuesday, September 18, 2012

Who Doesn't Take Debit Cards??

Hey guys! I hope you all had a great day, mine was a little busy and lazy at the same time. This morning my dogs woke me up at 5:45 barking, they were still on the bed and barking at the hallway? They are weird. I got up and painted a bit more of the closet and it is almost finished now, but a tad left to do and then I can start putting things back inside of it! 

We went to Home Depot this afternoon and got some little storage containers for my cross-stitch thread...I have TONS of it. We also had to stop by Hobby Lobby to get some Plastic Floss Bobbins so I can organize them all by color and number so they are easier to find because at the moment they are in a giant plastic bag! I would never be able to find which one I needed if they stayed in there. 

You wanna know something funny, I keep finding things that I didn't even know I had, and I somehow keep wasting money on things that I thought I needed but it turns out I have surplus of at the house. We are so disorganized it is ridiculous, so I am really hoping to change that. The main problem that we have in our house right now is lack of furniture and organizational things, like bins, boxes, etc. I hope that when we move into our new home everything will have it's place and it will stay there so I can find it when I need it! It is nice to have the time to go through an entire house and organize it before you move o that when you get there it should be fairly simple to get everything where it needs to go. 

On the guest room checklist here are the things that still need to be done before I can start working on the den.

Carpet
Finish Painting Closet
Organize Craft Closet
Purchase Mattress/Bed Linens/Pillows for Bed

That is all!! I am so happy that I am making really good progress on this room. I bet tomorrow we will make a trip to Staples and IKEA to get the things to finish it off! Mr. C is off work tomorrow and so I know I will have some help from him on this project. I have decided that I want everything labeled and I have picked out some really cool Martha Stewart Home Office ones made by Avery from Staples that I think will be perfect for what I am doing. The other thing we need to get are some storage boxes from IKEA, they are really inexpensive but perfect for craft closet storage. Who knows we may even go ahead and get a mattress tomorrow. 

We are really excited to get started on the den, right now it is an office and so we have already been scouring Craig's List for new pieces to put in there. So I guess for now, I am going to get back to putting floss on bobbins and then maybe watch the Dodger game...

Have A Magical Day!

Monday, September 17, 2012

DIY Driftwood Lamp with Jute Shade

Happy Monday morning my friends! It is another rainy one here, so another great day to work inside on some projects! This guest room is really starting to come together and there are only a few other things I need to do to finish it! Last night I started painting the closet, I made it about halfway through and my mom and dad stopped by, she had done a Walmart run and picked me up some glue sticks for my glue gun so I could finish my lamp! Needless to say the closet got put on the back burner until the lamp was done. I really need to have one project at a time on my focus or none of them will get done. With that said, I can finally tell you about our lamp!

I knew I needed a lamp for this room and I have seen plenty, all of them are either boring or really expensive!! I was on some design website the other day looking for ideas and I came across a driftwood lamp. Now, Mr. C and I both REALLY loved them. Only one problem...they ranged in price from $150 to over $1000 EEEK!!! Needless to say I wasn't going to be buying one anytime soon. So when we were at the Antique Mall the other day, they had driftwood for sale. We found a piece that we both liked and that looked like it would be ok for a lamp and got it! Next we went to Home Depot and got a lamp kit that only cost $10.97 I think. I needed a plain lamp shade that I could decorate, so the next stop was Walmart and I found one that would work for $14.97. Last stop was Hobby Lobby, I was going to make a Sisal Shade, but when I got to HL they had Jute which was darker and was going to work with my wood much better so I got that instead. So here is how the cost is summed up!

Driftwood $15.00
Lamp Kit $10.97
Shade $14.97
Jute $4.99

Total Cost for the Lamp: $45.93

Which is good because I have leftover Jute that I can use for another project. I already had a CFL bulb, and lots of random shells I added to it as well! So here it is, finished in all of it's glory!


I think I have become some sort of DIYaholic, I am really having a lot of fun making all of these things. I also gets tons of really great inspiration from Pinterest. I had no idea there were so many good ideas on there! Sometime this week I am expecting a book about Beach House Design, I am hoping that will give me some new creative things to do as I finish up this room and start working on the den! 

I guess for now I am going to get back to the closet, it is staring at me screaming, "Paint me, Paint me!" I am going to give it and do it. After that, organizing the craft stuff, now that is a bug challenge that I hope I am ready for. I have everything from Soap Making supplies to cross-stitch projects. I am in for a treat of a rainy Monday!

Have A Magical Day!

Sunday, September 16, 2012

Lovely Rainy Sunday Morning

Good morning, good morning everyone! It is a lovely rainy Sunday morning here in NC, and that is my favorite time to do crafts and projects inside. I also love to open the window and listen to the rain while I work. It is very calming and keeps me focused on the task at hand. I actually have a few of those today as a matter of fact. 

The first thing I did when i got up this morning was clear out the closet in the guest bedroom. For the moment, I am going to paint it and turn it into somewhat of a craft closet for the time being, but not permanently since we are moving in a few months. I have no idea what the sizes of the closets in the new house will be, so I am just going to improvise with this one and then do a proper one when we make it down there! The closet is completely empty for me to start painting later on this afternoon. Mr. C is asleep because he is on night shift now, so he got home at 6:55am and took a shower and went straight to bed, so basically I am trying to do quiet projects while he is sleeping, he works so hard and I do not want to wake him up prematurely!

That brings me to the first crafty project of the day! I have lots of little brown boxes around my house from Birchbox. If you don't know what Birchbox is, it is a little company that ships handpicked beauty and lifestyle samples right to your door for $10 per month. We travel a lot so I love it because I get sample sizes of things to try, like perfumes for instance, and I can put them in my carry-on luggage because they are definitely under the oz limit and they fit nicely in those little plastic baggies! But they ship them to you in a cute little box once a month. So I have started to accumulate a lot of these little boxes and I didn't know what to do with them...until now that is! I have tons of little things that need to be organized in my makeshift craft closet so I thought to myself why not cover them with paper and then find an adorable label and voila, instant storage solution! So that is what I am doing right now! Yesterday, we went by Hobby Lobby and I bought a few different coordinating scrapbook papers to cover them with. There is a great tutorial about covering boxes here:


Birchbox Before

Cut Paper to Wrap Around Box Lid

Coordinating Scrapbook Papers

Finished Box!

I decided not to cover the bottom with paper because I still like the brown box showing through. These will be great for holding things like bobbins, pens, buttons, really anything that I can put in them! Then they will stack nicely in my craft closet and be pretty at the same time! Well I guess I should get back to covering boxes! When the craft closet is finished I will do some before and after photos for you all, I still have a few other little projects that are getting done, I ran out of glue sticks for my glue gun, so when I get some more I can show you the lamp we made!

Have A Magical Day!


Saturday, September 15, 2012

DIY Window Map Wall Art

Good morning everyone! It is 7:55am on a Saturday morning and I am not quite sure why I am awake yet? I usually try and sleep in at least a little bit on Saturday's but oh well, can't do anything about it now, so why not blog right?? Mr. C starts night shift tonight and so he stayed up really late last night getting a few things done in the guest room that I hadn't made it around to yet, so I can check those few things off the list! Fantastic!! This room is really coming along and there isn't actually too many things we need to do in here for it to be finished! So onto the project of the night!

Last night before I went to bed we started and finished yet another project for the room! A few weeks ago Mr. C had ordered some coastal maps and we hadn't decided on what exactly to do with them until last night. The maps were from eBay and we got 2 for $15 with free shipping. Yesterday, as I mentioned before we went to the Antique Mall again and picked up 2 old windows for $16. When we got home he cleaned them all up and used that Goof Off stuff (which is AWESOME if you have never tried it!) to get the excess paint etc from the glass. We thought and thought about what to do and then finally decided on it! We were going to make some wall art with the maps and windows! We really loved the idea. 

Tools:
Paintbrush
Modge Podge
2 Old Windows (6 Pane)
2 Coastal Maps
Wall Hangers
Scissors
Writing Utensil
Yard Stick

We started by measuring the window panes and then drew out a grid on the map as to where we wanted it centered inside the window. Then we cut out the pieces and modge podged them into place. He put the wall hangers on the back the Voila, Wall art!! I had a few pieces of leftover map that I thought would look cool in frames. We vacationed at Carolina Beach/Kure Beach/Fort Fisher when I was younger almost every year and so those places have sore of a special place in my heart, therefore I used the glass inside 2 other small photo frames I had gotten at Goodwill and cut out the map so it would fit inside there! So here you go, here is what we made! 

Cost: $15 per window (we did 2), then the small frames at Goodwill were only $1.99 with leftover map pieces so, less than $2, which I was very proud of!

Both Coastal Map Window Art Pieces
Close-Up
Leftover Map in Frame (Carolina Beach/Kure Beach/Fort Fisher)
Other Leftover Map in Frame (Bald Head Island)
 I hope you all enjoyed this DIY! Maybe it will inspire you to do the same kind of thing for your coastal room! Who knows, you may even find a map of your area that you really love!

Have A Magical Day!


Friday, September 14, 2012

DIY Bulletin Board

Hello once again everyone! We had another fun day of antique shopping and even stopped by our local craft store to pick up some things to put in our guest room that I am working on at the moment! 

I am subscribed to Coastal Living Magazine on my tablet and today I got the newest issue October 2012! There is a really great section in there about home office stuff! I saw this awesome Seahorse Bulletin Board in there and loved it, but it came at a HEFTY price tag of $275 from LG Designs (lgcustomaccessories.com if you are interested in looking at it) I thought to myself that I could make one and it wouldn't cost anything NEAR that much to do! So today, Mr. C and I went to Hobby Lobby. They were having a 50% sale on their frames with glass so we picked up a 22x28 sized frame for $25 (regular $50), and a yard of fabric $3.99. We then went by Home Depot and picked up a roll of cork with contact paper on the back for $9.96. So for $38.95, I had a Bulletin Board that looked EXACTLY like the one in the magazine!

It was very simple to do and anyone could do it. I used a light duty staple gun and staples and that was it for tools!

We took the glass out of the frame, then attached the cork to the cardboard inside with the contact paper on the back of the cork. Then stretched the fabric over the cork/cardboard and stapled it to the frame so it wouldn't come out and that was it. We already had hangers to attach to it and then we just hung it on the wall! A great little project for under $40 and now I can get some push pins and go to town on it! Tell me what you think!

Empty Bulletin Board Ready for Stuff!

Disregard the Painters Tape and Empty Desk, the room is still incomplete

I have plans for lots of different things to put on the board! I can't wait to start filling it up. We bought an awesome piece of driftwood that loos like a whale I think, so that got hung up on the wall today! Also I purchased another piece of driftwood to hopefully make a lamp from...fingers crossed!! 

Have A Magical Day!

Thursday, September 13, 2012

A Few Hours At The Antique Mall

This morning I finished painting my $8.99 bookshelf that I got at Goodwill the other day and I am very happy with the color that I chose for it! It is called Sea Glass by Martha Stewart which comes in a Glidden paint from Home Depot. The only problem I had now was what to put on it? Jeremy is about to start outtage at work, so today they had a meeting which meant he got off early! WOOHOO! He came home and by 2:00 we were heading about 45 minutes away to an antique mall. I knew that for the room I needed some side table or something to go beside the bed, stuff to put on the bookshelf, and a desk and chair. Now, I have never been one for shopping for antiques, I have always been more of a modern type girl. This is a whole new experience for me, I was so overwhelmed when I went into this place, I didn't even know where to begin! We spent about 2 hours just walking around looking at everything, I knew that they closed at 6, so at 5 I really needed to start making some decisions! We walked around one more time looking for some things I had remembered from earlier. Before we came I had set a budget for the day and I was adding up everything as we chose it so I wouldn't go overboard, because it would have been VERY easy to do so! Once all was said and done I had come in $30 under budget! I was pretty proud of myself with that feat and we were very happy to have all of these "new" things to take home with us! Here is what all we got! I will put photos up as the room is completed so you can see where I utilized all of the things!!

Glass Vase FULL of shells
About 6 Blue Ball Mason Jars
Rabbit Cage?
2 Large Conch Shells
Small Sewing Box
Porcelain Topped Farm Desk
Industrial Metal Chair/Stool
Misc Sea Shells
Large Driftwood Piece that looks like a whale

I am happy to report that the Bookshelf is now full!! I am still searching for the perfect lamp to go on there, but other than that it is a happy shelf. On the top I have the rabbit cage with a conch shell inside, an old first edition book from 1908 that just looks cool with a little wooden dog on top I have had since I was about 11, and two of the many mason jars, one holding some fake flowers (for the moment). On the second shelf I have a Goodwill frame, two stacks of Nicholas Sparks books (we are from and moving to NC) with shells on top. On the third shelf I have the sewing box with a sand dollar leaning against it, the largest conch shell and another Goodwill frame! 

On the new desk, I have moved my Mac onto it, and it is very happy with its new home, now I just need to find lots of other fun things to put on it as well! Things are moving along quite nicely for this guest bedroom and I cannot wait to finish it in the near future! I guess my next project is to figure out what to put on the walls in here!! Until next time...

Have A Magical Day!

Wednesday, September 12, 2012

DIY Coastal Bench from Goodwill Find!

Good afternoon everyone!! Today I did a DIY Project for my guest room. Last weekend, Jeremy and I went to a few different Goodwill's and found a toy box for $9.99! Well today I made a trip to Home Depot and picked out some paint, and Mary Jo's Cloth Store to get some upholstery fabric. I had already picked up some caster wheels at Home Depot two days ago for the project! Here is the link I used to get the inspiration from!


Before Pictures of the Goodwill Toy Box:

Toy Box Top

Goodwill Toy Box
Goodwill Toy Box transformed into Coastal Rolling Storage Bench!

Coastal Rolling Storage Bench

Bench Close-Up

I am really happy with the way it turned out considering this is the very first time I have ever refurbished a piece of furniture before! I have definitely never even attempted to upholster anything EVER! I may decide to shabby it up a little bit in the future, but for now I am happy with the way it sits! Whenever the entire room is finished this little beauty is going to sit in front of the twin bed my husband made for the room! Now onto my next project which is painting yet another thing I found at Goodwill, a bookshelf I paid $8.99 for! 

Have A Magical Day!


Monday, September 10, 2012

Bed Building and Craig's List

Good morning everyone! We had a very busy weekend but I am finally back on schedule! Friday we drove down to the beach to start looking at houses, we don't have an official move date yet but we are excited to start looking in our new town. We found a few houses that we liked but nothing yet that we LOVED. I know it will take a little bit of time until we find exactly what we are looking for, so I am not too worried about that first preliminary trip down. 

Saturday we had a yard sale and did pretty well, I might add! We made enough money to pay off one of our credit cards completely so I was very happy about that. It feels so good to pay off debt, makes me feel like a new person. We were so tired Saturday after the yard sale that we didn't do much else that night, I knew we needed to make a Home Depot run, but that would have to wait until Sunday. We did manage to look up a few things on the computer. Since the middle bedroom is almost finished being painted, I wanted to go ahead and start planning out my first guest room for the new house and use this one for all of the stuff. I know that in the smallest guest room, we either wanted 1 or 2 twin beds as opposed to a full or queen which will be in the other guest room. I have been scouring coastal design sites and such for a while trying to get an idea of what I would like to do in there and have been looking around for beds that would fit into my mold. Well I couldn't really find any that stood out to me, and the ones that I did find were from IKEA. They were a little different than I wanted and they were also $399 a piece! That used to sound like a good deal to me, but now I am trying to be more frugal while decorating a new house. I asked Jeremy that if I designed a bed could he build it for me, and he said yes!

We started drawing out a plan for a twin bed, I wanted it to have space underneath for storage baskets, and to have wooden slats up the sides. He drew out great plan for it and figured out what all materials he would need, so we would have everything ready for our HD trip on Sunday!

Sunday morning we woke up and got dressed and ready and then went to HD, We got everything we needed to finish the middle bedroom like electrical outlets and covers, a fan to replace the crusty one, some extra paintbrushes, and a light switch/cover. Then we made our way over to the wood section to buy everything for the bed! All of the materials for the bed ended up costing us less than $150! That was a huge savings, this bed was going to be much more sturdy and last a whole lot longer than a bed from IKEA, and it was exactly what I wanted, instead of kind of what I wanted! When we got home Jeremy started working on it right away and was finished with the exception of a few little details by last night! Now all I have to do is paint it and then accessorize it! I am so happy with the way it turned out, I cannot wait to get pics of it to you guys, and maybe the plans so you could build one yourself if you wanted to! 

This morning I got up and started looking on Craig's List for an old advertising box that I would like to make a storage bench out of to place at the end of the bed. I couldn't believe that someone had just put one on there yesterday, I emailed the guy and it was still available! I jumped on and in a few minutes I am going to go over there and pick it up, then get started on that project. Busy Busy Busy! I have so much going on but I am having a great time doing all of this!

Have A Magical Day!!

Thursday, September 6, 2012

Painting The Middle Bedroom...

Good morning from NC! I hope everyone is doing well today! I am still running around like a chicken with my head cut off trying to figure out what to do with everything in the house. I feel like I should put my list on here so you guys know just how much stuff we actually have to do to get this house ready before we move/try to sell it!

Last night I managed to start on a project because I already have everything TO start it! The middle bedroom in our house has been the same color since I think 1995, which is the year that our family moved into it. I was in 4th grade, and I had a rainbow water bed, so naturally I wanted the bedroom to be sky blue!...even the carpet in there is blue! Quite a few years later, more than likely when I was in high school, my sister was married and had a baby named Allison, well she moved Ally into that room and put up a border around the top...OMG that border is a paint in my fricken neck! It is an utter nightmare! The paper came off fine enough, but the glue or what I would call yellow cement will absolutely not come off of the wall. 

These walls are kind of ridiculous anyway. They are not drywall, they are some type of wood paneling? I am not exactly sure what they are, but I am just going to make them look presentable enough that the new owner can decide what to do with them. So last night I started painting over the blue using a No VOC paint, with a color called Of The Earth. It is a lovely neutral tone which will be perfect for a clean slate for someone else to cover over it! Ooh, Idea!! I am going to take a before and after picture so you guys can see what I am dealing with! Moving on, that has been my current project. I will probably work on some more of that today. I will have to do a lot of moving stuff around, which is more annoying that anything because I don't really have anywhere for it to go, plus a lot of it needs to be sorted through and organized! 

Today is looking like it might turn out to be a rainy day, which is fine with me, I like working on inside projects when it is raining outside! I usually just open the windows so I can hear the thunderstorm as it rolls through. Tomorrow, we are still planning on heading down to the beach to look around at some houses that I wrote down to see their locations, as well as do a little bit of antique shopping for our new abode! Who knows, I may even have a haul list for you when we get back? Anyway, I guess that is all for now!

Have A Magical Day!

Wednesday, September 5, 2012

Goodwill Haul: Part Two

I am kind of at the point when someone knows they are going to move, and they get overwhelmed with all of the things that need to be done! Sheesh, we have an huge list of stuff that has to be done to the house, I need to go through everything to find out what needs to be sold, kept, donated, or thrown out! We are supposed to have a yard sale on Saturday of this week so I am also trying to get everything together for that. So it is all a tad overwhelming, but I am trying to do one thing at a time instead of worrying about all of the things that need to be done. But anyway, with that little spiel out of the way we can get back to the original point of this post!

Round two! I don't want to clutter up my blog with too many photos right off the bat, but I still want to show you all what I managed to get at Goodwill on Labor Day! 

Desk Caddy, that I thought looked Beachy

Jeremy really liked this box, we are gonna repaint it!

I found lots of glass stuff, gonna fill it with shells or sand or something?

Really cool basket, maybe for towels, or decor?

I like this one, either for picnics or craft stuff!

I definitely thought guest bath towels for this one

A Chest we are gonna sand and repaint and for only $9.99!

A Pair of Cool Candle Holders

The old encyclopedias were really cool, the whole set wasn't there but I managed to get A, S, & C, which happen to be my initials!

I think I mentioned it before, but Friday Jeremy and I are driving down to the beach to look around where our new home is going to be, and bonus he wants to do a little antique/thrift shopping while we are there, so I may get some more fun things this weekend! Our first yard sale is going to be on Saturday, so hopefully we can make some money and then either use it for bills or to buy more things! I am having fun already and I know it is going to get even better as it gets closer to our move date! Have A Magical Day!!


Tuesday, September 4, 2012

Goodwill Haul!!

Good morning! As some of you know, Jeremy and I went to 7 different Goodwill's yesterday. We are starting to assemble stuff that we think will fit in with our new house. We don't want to go too overboard spending money which is why we are buying things secondhand at the moment, but I am still pretty crafty and like to fix things up anyway so it works out pretty well for me! As I said in my last post we are trying to go for a shabby chic coastal/nautical design theme for our new home and so today I am going to show you some of the things that we purchased! 

$0.99 Frame that I am going to make custom beach art with!

Some other $0.99 Frames I thought were cool!

Going to repaint these two frames, but I thought they were interesting!
There was a few things that every single Goodwill had, frames/art and baskets! They are everywhere there! As far as artwork we found a few pieces that we liked but, one set looks a little more tropical so we are going to repaint the sides and whitewash over it to play down the bright colors, and the other is a lighthouse that Jeremy really liked so I told him I would work it in somehow!


Hopefully I will get back a little later today to post more of the stuff that we found! We bought a lot of things, I mean our car was completely full with everything that we got yesterday!! So if I don't see you again today...Have A Magical Day!!


Monday, September 3, 2012

Just a little welcome note...

Hi everyone! I am pretty new to blogging, but I wanted to chronicle this journey we are about to start! We are about to move from a small town in the middle of North Carolina to the beach! My husband just got a promotion at his job that requires us to move to a new area, so in just a few short months, we will be doing just that! We both grew in the same small town and have lived here out entire lives. All of our family lives in the same area too! We don't know anyone in the new town we are moving to, so this is going to be a big step for the two of us and our doggy/bird family! At this time, the timeline is about 70% certain, the move is 100% certain, we just don't know the exact time frame just yet. So for now, he is supposed to start work on January 1st of 2013. For now, we are just sort of packing up things we know we won't need or use in that time frame, and getting stuff together for a yard sale next Saturday. We are also planning on going to check out the town next weekend! We do not have anything in our current home that will fit my design theme for our new beach home, so we are going to get rid of pretty much everything we own and start fresh down there! 

I have been scouring the internet for DIY crafts, design ideas, and all sorts of other things to start planning for our new beach home. We have kind of decided on a shabby chic coastal beach decor...hopefully that makes sense! I started using Pinterest yesterday to keep all of my ideas and sources together, so you can follow along on there as well if you would like! 

Today we decided to go to Goodwill, actually 7 of them all over the area and look around and see if we could find anything that would fit in with my new theme and/or anything that I could MAKE fit in with that theme! We were so surprised that we had a car load of things when we returned home and got all of it for less than $100! So I should have a few DIY projects mixed in here pretty soon as I start getting ready and planning out these rooms! 

But like I said, I just wanted to give everyone a quick welcome to my new blog and hopefully we will have a wonderful journey together! Oh and one more thing, I am a HUGE Disney fan...so at the end of every post, I will say...

"Have A Magical Day"